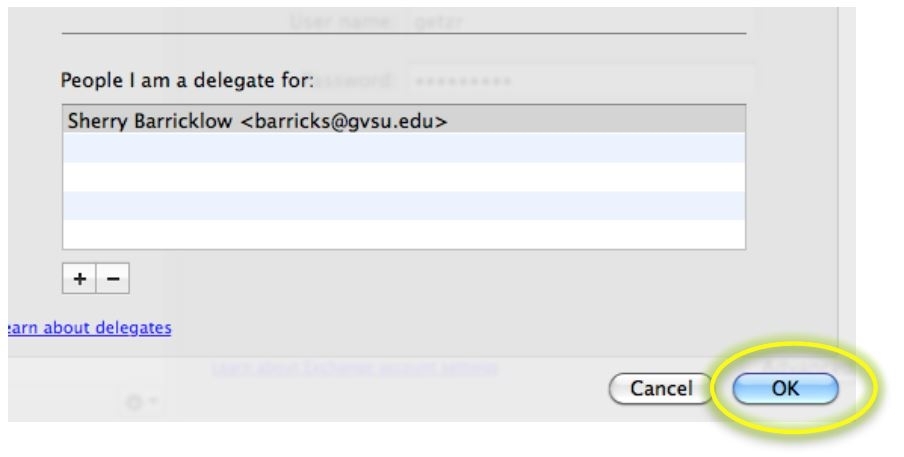
Assigning Delegates in Outlook for Mac
You can designate others to work with your email, calendar, contacts, tasks and notes. Assigning a delegate allows them to act on your behalf with duties such as sending emails, meeting requests, cancelling and rescheduling appointments.
The owner of the account must give permission to a delegate before the delegate can work with the owner’s files.
To set up a delegate for your account
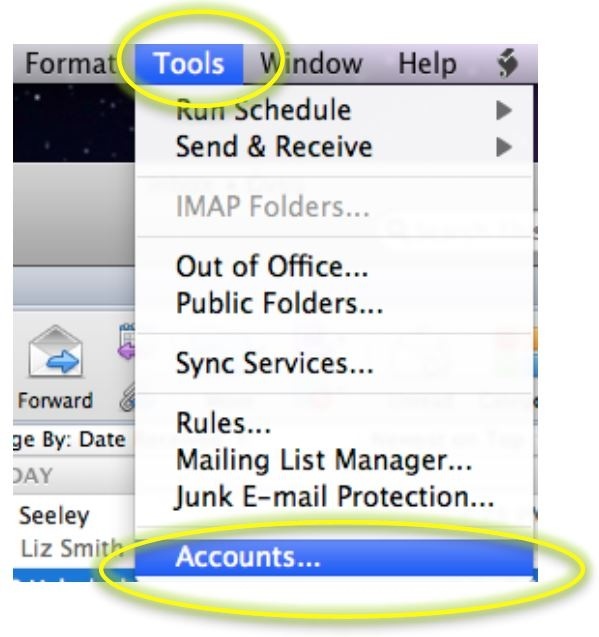
- Open Outlook. On the Menu Bar at the top, click on Tools and then Accounts.
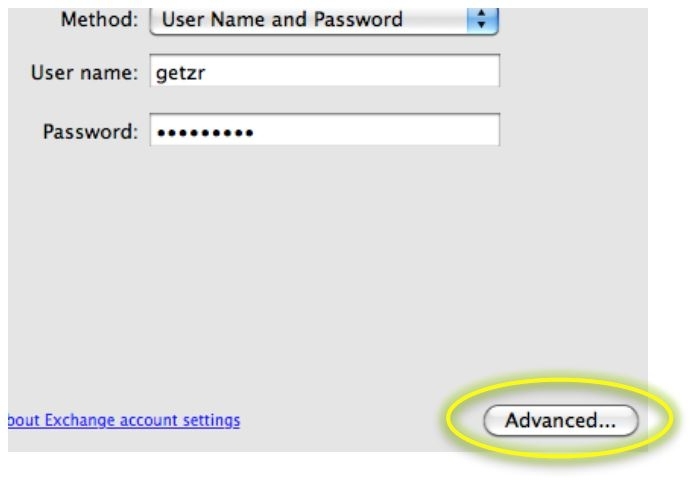
2. Click on the Advanced button at the bottom of the pop-up window.
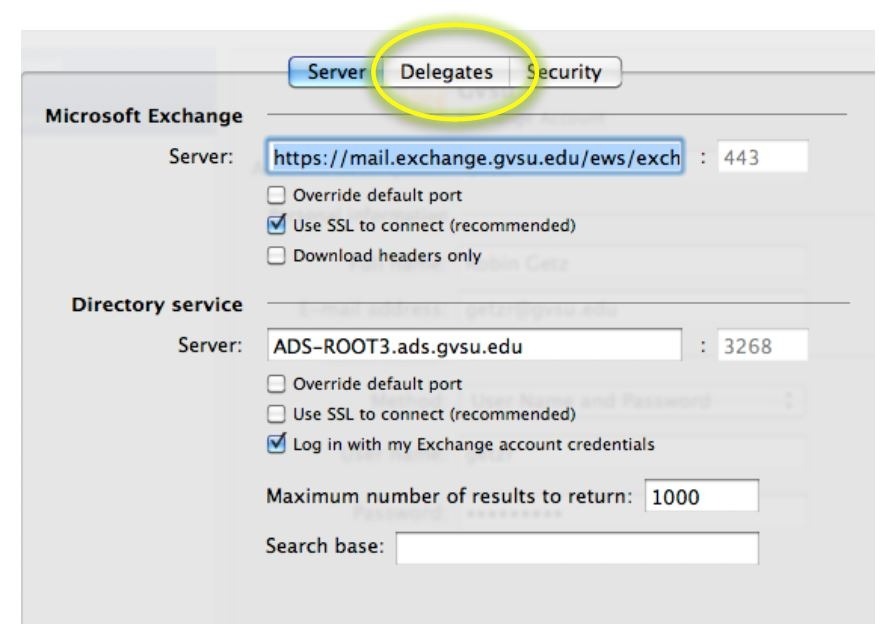
3. On the next window, click on the Delegates tab at the top.
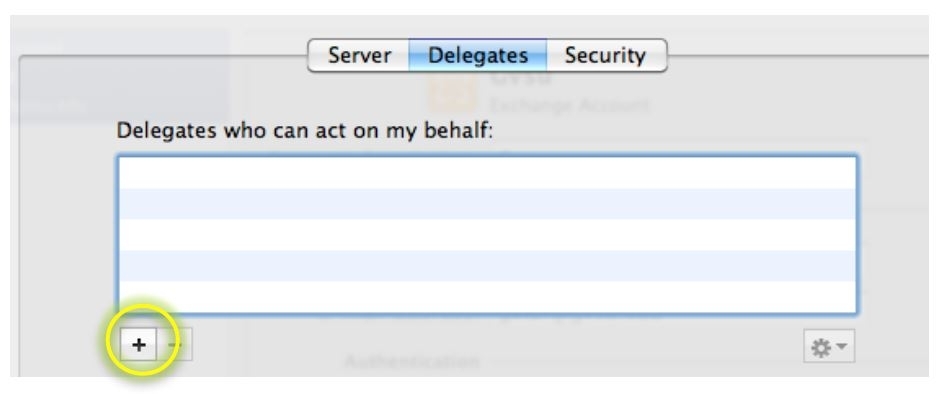
4. Click on the + sign under Delegates who can act on my behalf.
5. Type in the name of the delegate and click on Find.
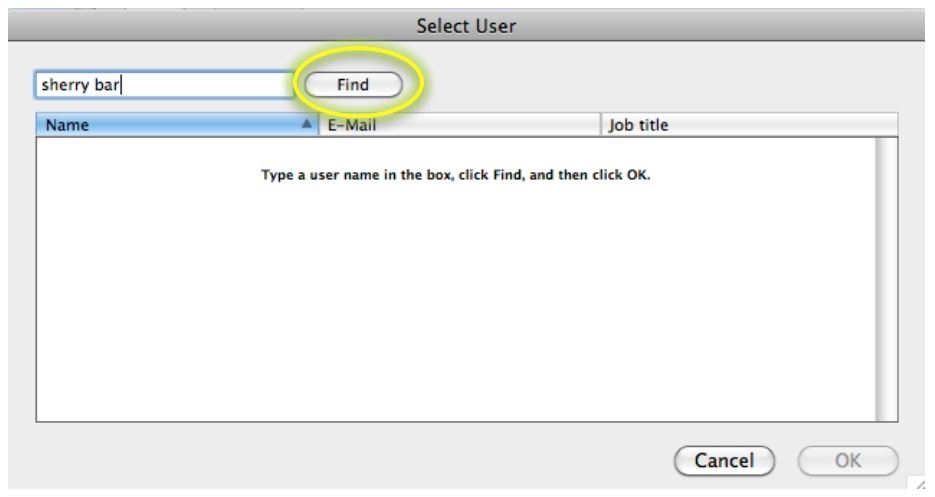
6. Select the name by clicking on it and click OK.
[1559317172].jpg)
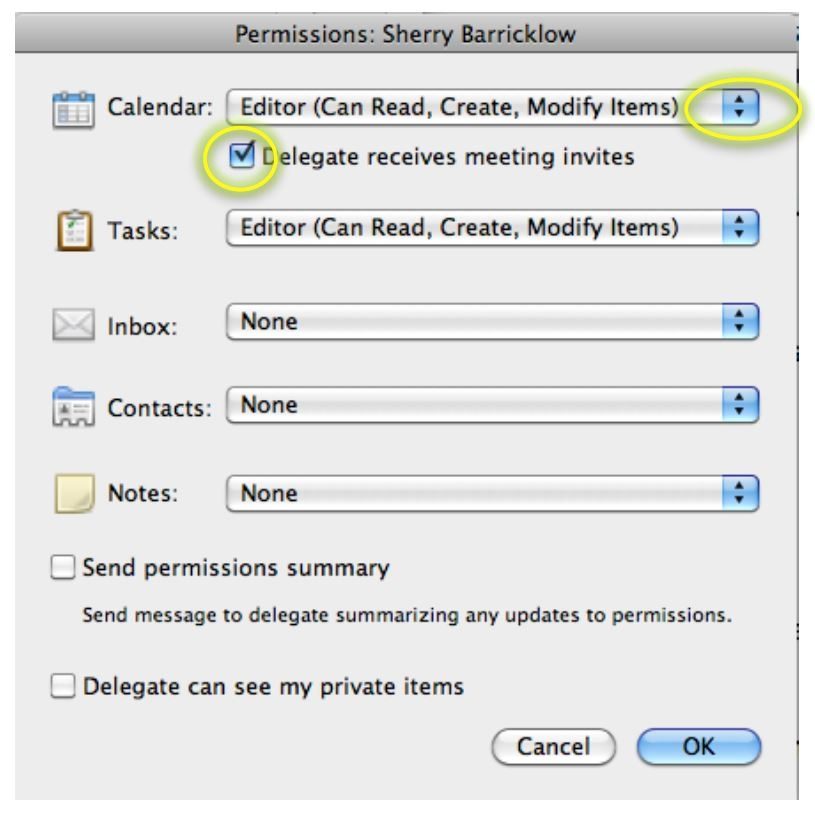
7. In the pop-up window, select which items you would like this delegate to handle and the appropriate level of permissions. Under the Calendar, you can check the box if you would like Delegates to receive your meeting invites.
8. You can check to have a message sent to the delegate summarizing their permission levels. You can also give the delegate permission to view your private items if you wish.
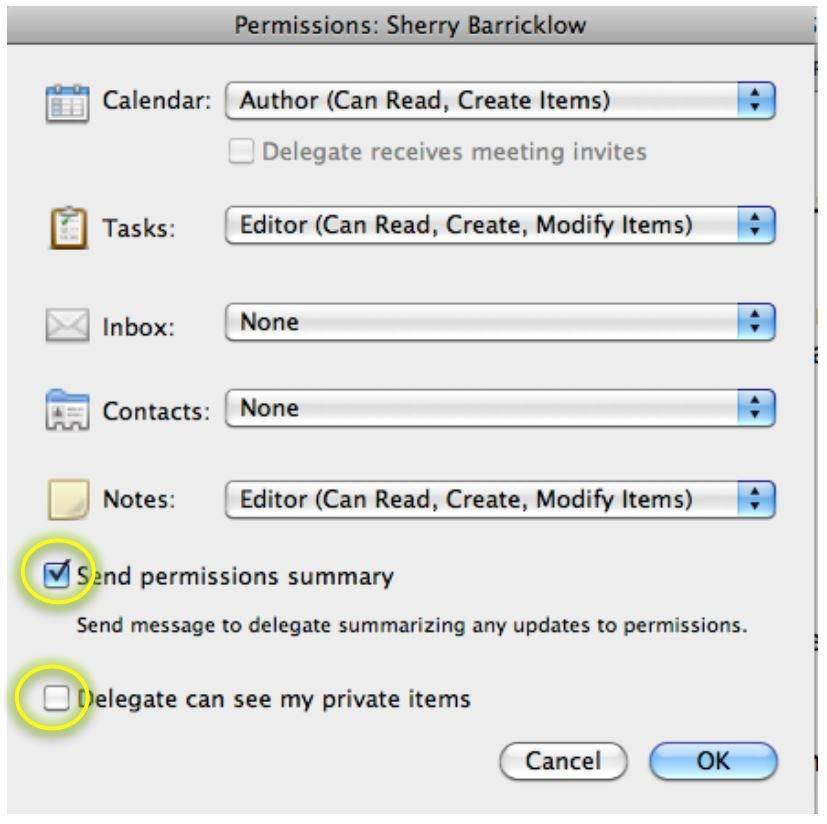
9. Click OK.
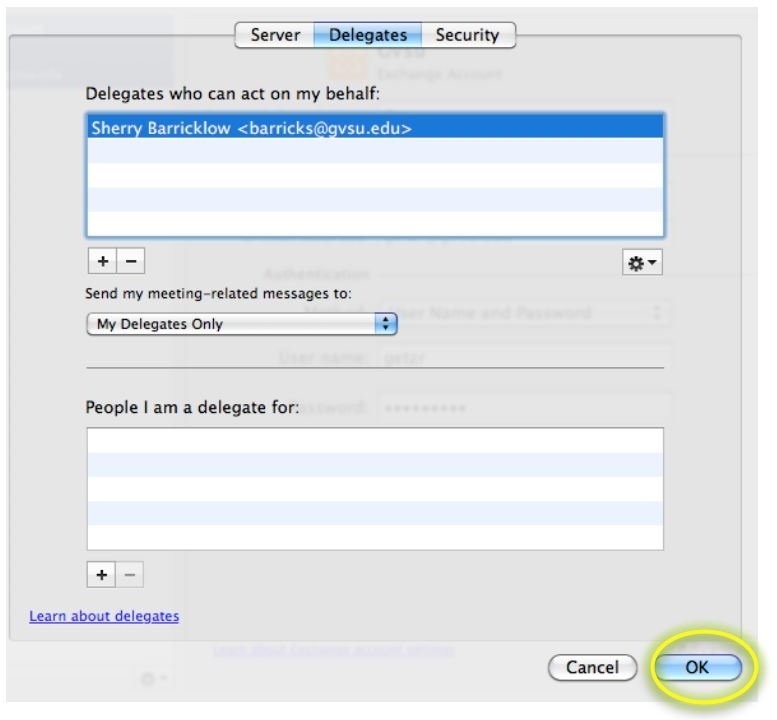
10. If your delegate is in charge of setting up meetings or appointments, you will receive an email letting you know that a meeting or appointment was set up for you.

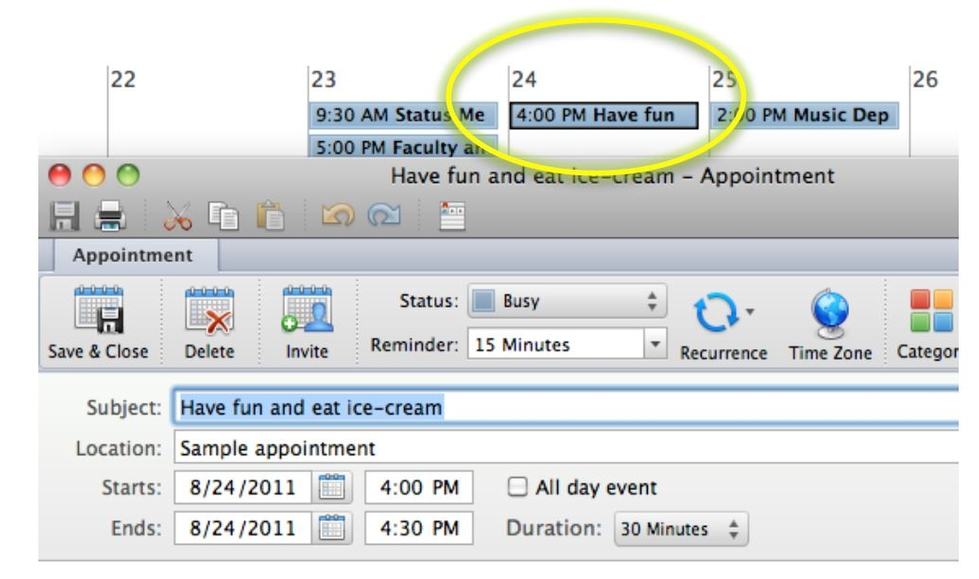
11. A meeting or appointment set up by the delegate will display on your calendar. You can select the meetings to see the details.
To Accept Delegate Responsibility
1. Open Outlook. On the Menu Bar at the top, click on Tools and then Accounts.

2. Click on the Advanced button at the bottom of the pop-up window.

3. On the next window, click on the Delegates tab at the top.

4. Type in the name of the delegate and click on Find.
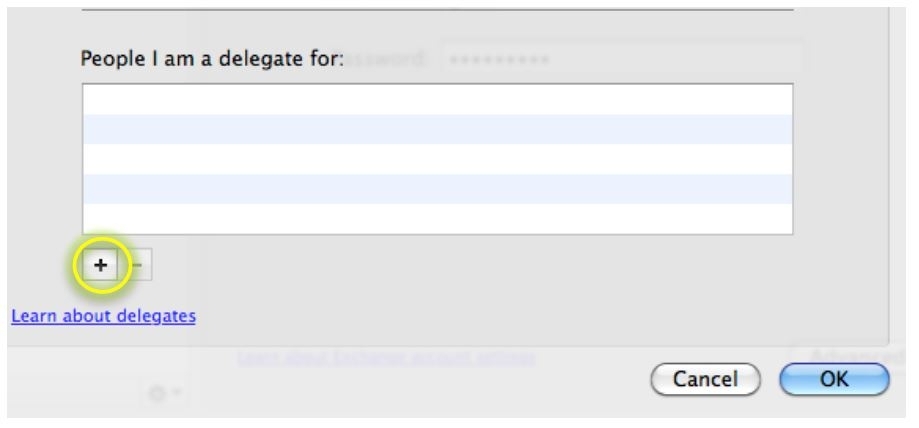
5. Click on the + sign under Delegates who can act on my behalf.

6. Select the name by clicking on it and click on OK.
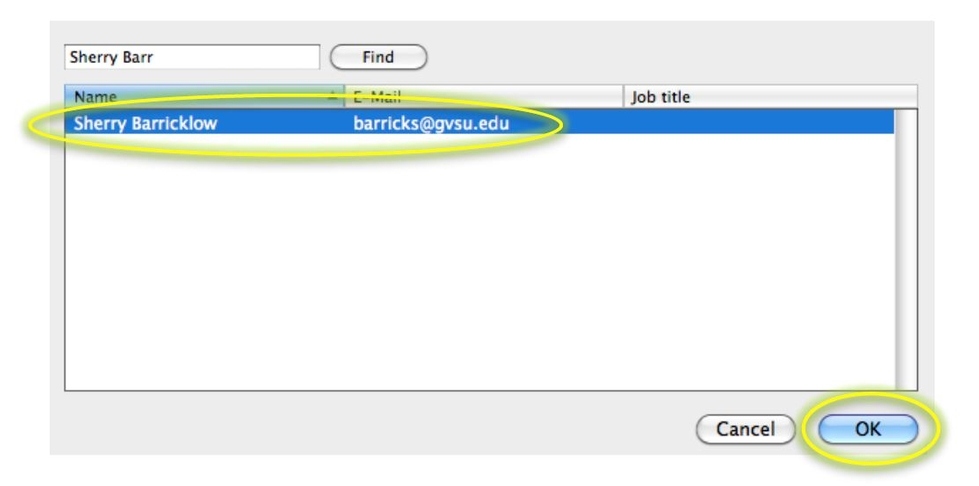
7. Click OK.
