How To Add A New Contact Group In Outlook 2016
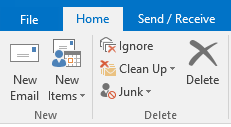
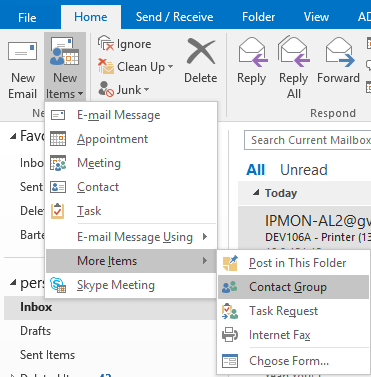
- Click the Home Tab in the Ribbon, click New Items icon.

2. A drop down menu will appear – at the bottom click on the More Items icon. Another drop down menu will appear – click on the Contract Group.

3. In the Name box type in the name of the Contact Group
4. Next, click on the Add Members icon – at this point you can select to add members from the Outlook Global Address book (From Address Book), or your contacts (From Outlook Contacts), or you can create a new contact (New Email Contact) and add it to your Contact Book.
5. Click the Save & Close icon (in the Actions Group once you have finished adding members to your Contacts Group.

The new contact group will now appear in your contacts.
