Emma Tutorial
What's Emma?
Emma is the email marketing software that University Marketing has chosen to assist departments/offices with the creation and sending of email campaigns. It has a drag-and-drop interface similar to CMS 4, manages subscriber lists, and provides reports measuring the effectiveness of a campaign. Two GVSU-branded email templates are available for general university use and we can help with basic troubleshooting. Departments are responsible for content and recipient lists.
For brand consistency and maintenance reasons, we are unable to accommodate requests for custom Emma templates.
Please note the following:
- Only one Emma sub-account will be created per department/office.
- University Marketing's contract with Emma is per contact (email address) stored in the system, not per email sent. Please clear your unused contacts as soon as possible
- Full access will be given to faculty and staff only (@gvsu.edu email addresses); limited access, with no ability to send campaigns, can be given to student employees (@mail.gvsu.edu email addresses).
- Emma usage will be reviewed periodically and those sub-accounts without activity in the preceding 12 months will be deleted.
Want access?
Please fill out the Emma account request form. Set up will typically be completed within 1-2 weeks.
To add administrators to an existing account, please have a current administrator contact Kelley Rogers.
Note: This tutorial is for Emma's drag-and-drop editor. Looking for the tutorial for the Emma "legacy" editor instead?
To jump to a specific section, choose a topic:
Clean Up Recipients (Clear unused recipients, remove all recipients, export recipient lists)
Getting Started
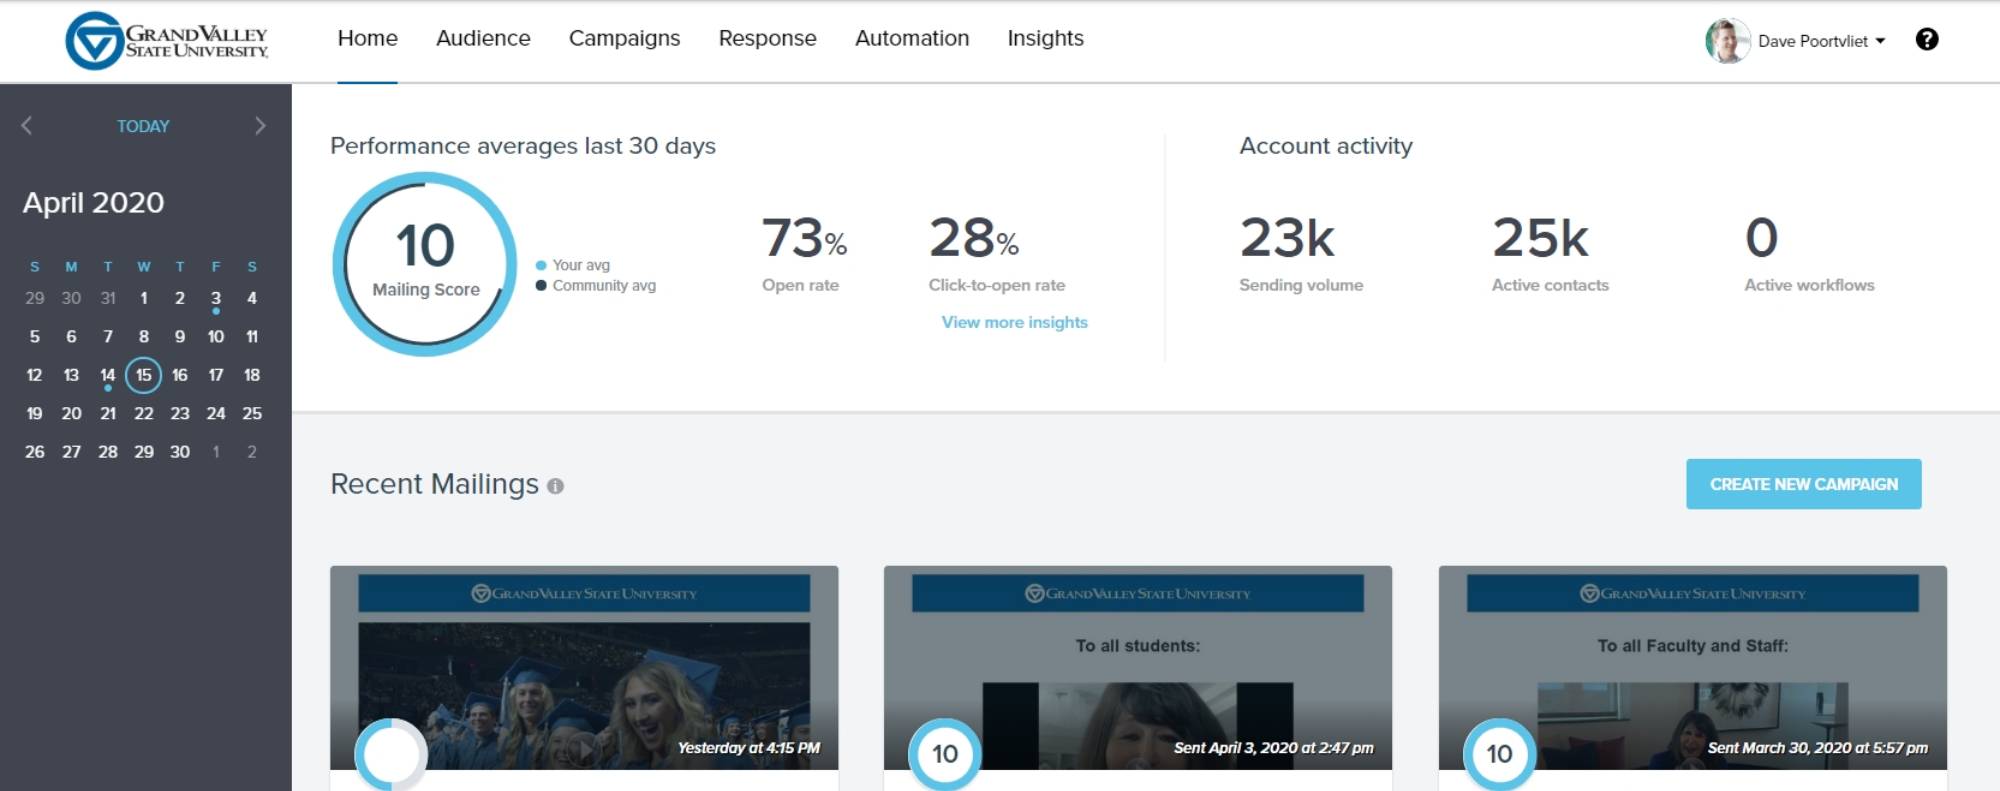
After logging in, the first screen you'll see is the account summary. Click "Campaigns" in the top navigation bar.
If your account is new, click the blue "Create new campaign" button in the center of the screen. To start a new email, the "Create new campaign" button will be on the right side of the screen. After clicking either button, you'll first be prompted to name your email campaign.
To edit an existing email, simply click the email's name.

Adding and Editing Content
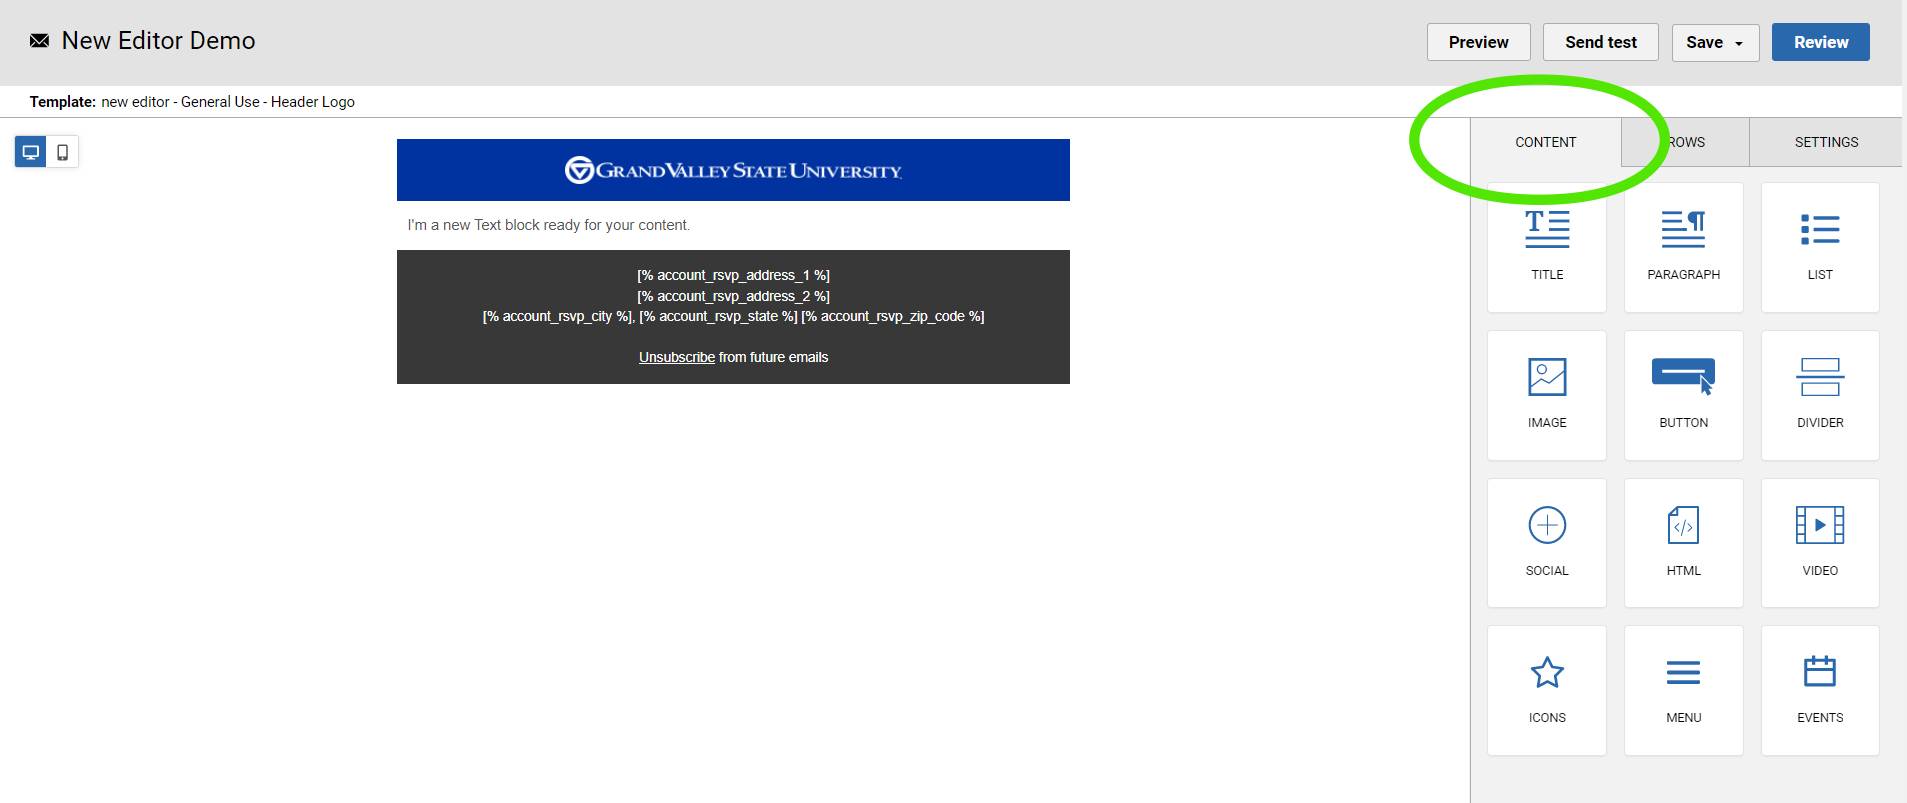
By default, a new email campaign will have a row containing one placeholder paragraph cell. There will also be a locked row with the GVSU logo on a blue background, and a locked dark gray row with Emma tags to display your department/office address and an unsubscribe link. Emma will replace these tags with your actual address when you send a test or send your completed email.
To add content: Click on the CONTENT tab on the right panel, then drag a content type onto the email. A blue "Drag it here" bar will appear to help you position it. Once it's in place, you can add your text, image, etc.
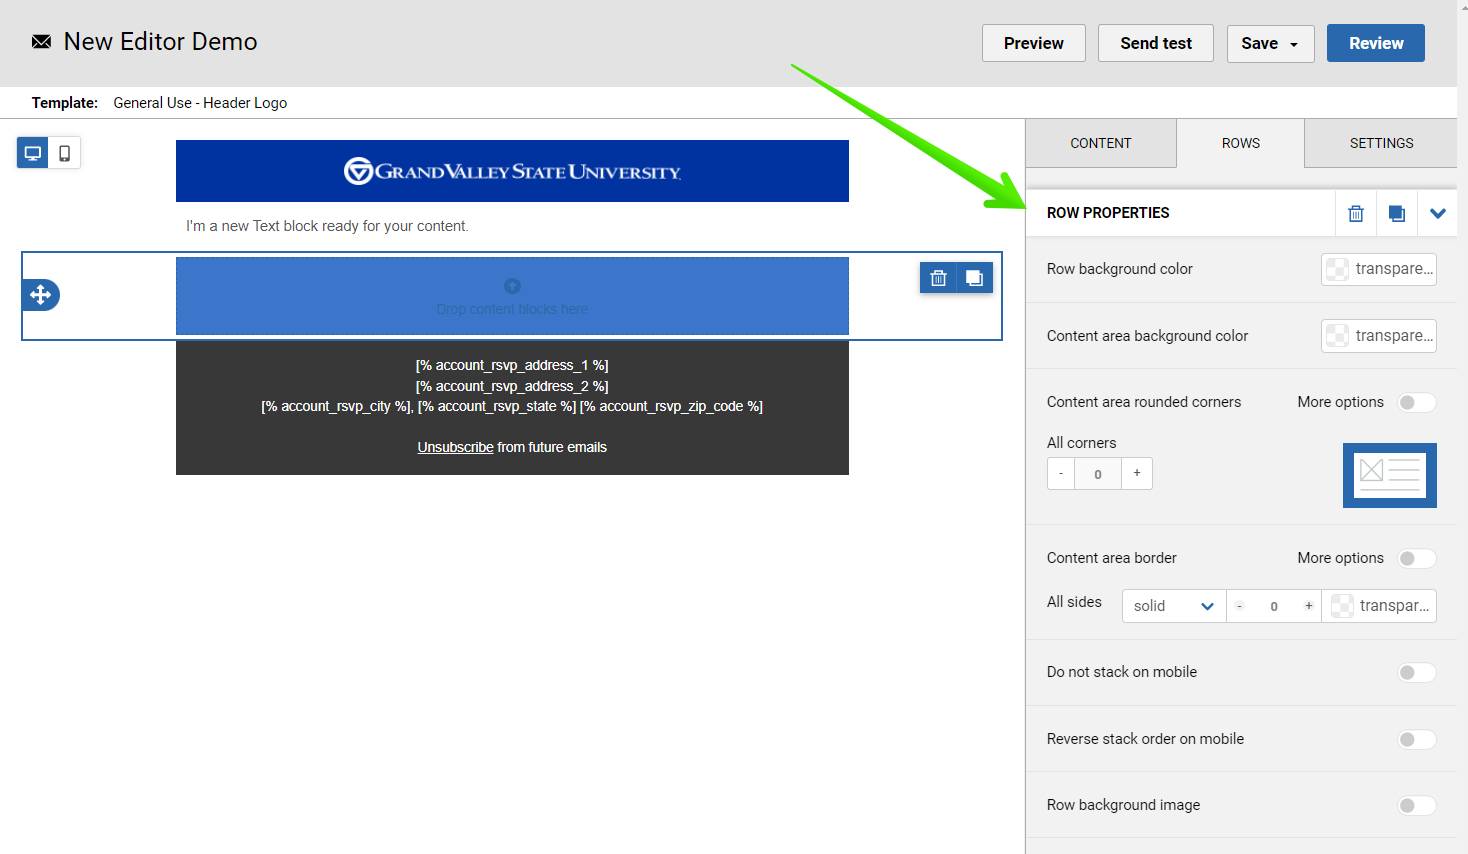
Click anywhere on your content block (it'll be outlined in blue) to display its properties on the right of the screen.
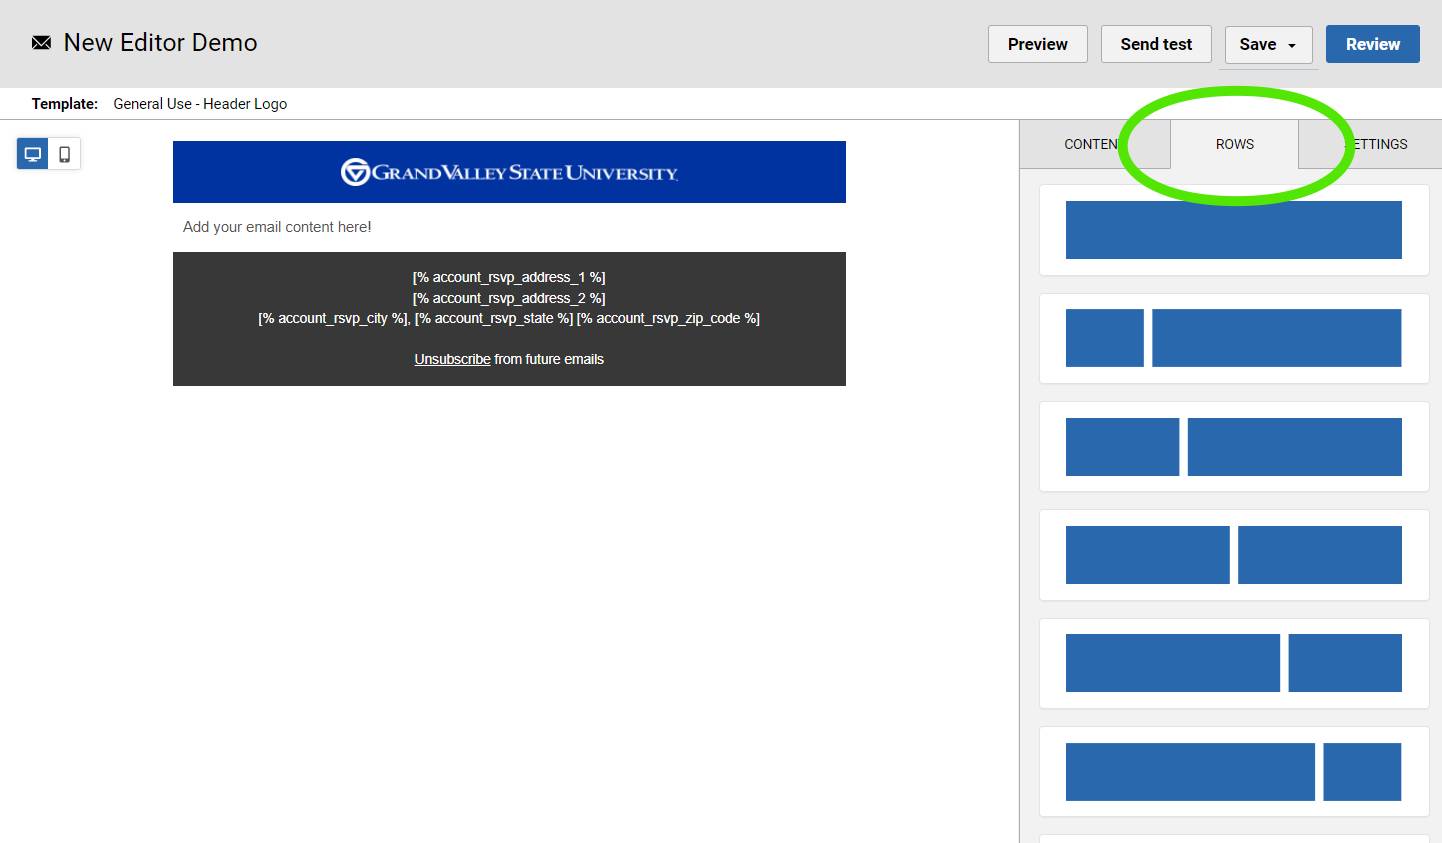
To add additional rows: Click the ROWS tab on the right side of the screen to see all the row layout options. Drag one onto the email, and a blue "Drag it here" bar will appear to help you position it. Once the new row is in place, you can click on the CONTENT tab and add content blocks.
Tip: Unlike the CMS, it's possible to stack multiple blocks of content in a single row. This can make it easier and faster to set consistent padding around sections or add a background color.
Adjusting rows and content items:
- To move a row or content item, click and drag the 4-way arrow icon. For rows, this appears on the left side, and for content items, it's on the right.
- To duplicate a row or content item, click the icon of two sheets of paper. For rows, this will be at the upper right corner of the row, and for content items, it will appear to the bottom right of the content.
- To delete a row or content item, click the trash can icon. For rows, this will be at the upper right corner of the row, and for content items, it will appear to the bottom right of the content.
To select a row, click to the left or right side of the content item(s). The row will be outlined in blue and the row properties screen will appear on the right panel. (If you click a content item, the content properties will appear on the right instead.)
A few Row Properties tips:
- Content area background color: "transparent" by default, this is where to set a background color that matches the width of the GVSU logo bar and address footer.
- Customize columns section:
- Besides dragging in a new row, you can quickly add a column on an existing row by clicking "+ Add new".
- When your row contains multiple columns, you'll see an 8 dot icon between two columns. Click and drag the icon left or right to quickly adjust the column widths.
- Click an existing column to select it, then click "Delete" to quickly remove it.
- Click the "More options" slider in the Padding section to specify separate numbers for top, right, bottom, and left padding.
Other tips:
- The hex code for GVSU Blue is #0032A0.
- The paragraph chunk requires a consistent font size, font face, color, etc. for everything in the paragraph. To style text differently (for example, to style a header differently), use separate Paragraph chunks and use top and bottom padding to vertically space them as you'd like.
Undo
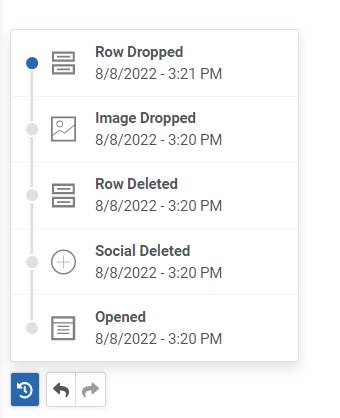
There are three icons in the lower left corner of the screen.
Click the left icon (clock hands with a counterclockwise arrow) to see the full history of an email campaign during your work session. To quickly go back to a previous point, click that entry on the list.
To step through previous edits, click the left or right arrows.
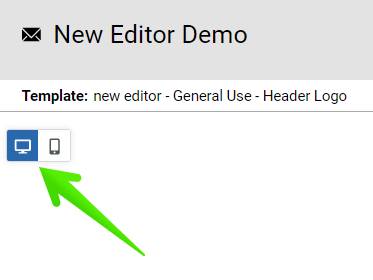
Mobile View
The top left corner has two icons: a computer monitor and a phone. Click the phone icon to switch to mobile view.
Click any of your (editable) content areas and you'll probably notice at least one "mobile" indicator in the right column's settings. If you make any changes to that section, the indicator will turn blue. This means adjustments have been made to that area (padding, alignment, etc.) that will affect mobile view only.
To go back to desktop view, click the computer monitor icon in the upper left corner. The "mobile" indicator(s) will disappear from the right column, and any changes made will affect desktop view again.

Logo Usage
When placing a Grand Valley logo in emails, you must use the blue version of the logo. This ensures proper background contrast in both light and dark viewing modes. Zach has created a video showing which logo file to use, and why it matters.
Duplicating an Email
Once an email has been built, you may find it easiest to make a copy of it for future use. An email can be duplicated before or after it's sent.
Before Sending:
From the "Emails" (drafts) screen, click the down arrow to the right of the email's name. Click "Duplicate".
After Sending:
Click the "Sent" tab under the "Emails" page title. You'll see a list of all the emails you've sent. Click the down arrow to the right of the email, then click "Duplicate".
Recipients
Contact lists are added by uploading an Excel spreadsheet or .csv file. To add recipients, click the "Audience" button in the top toolbar.
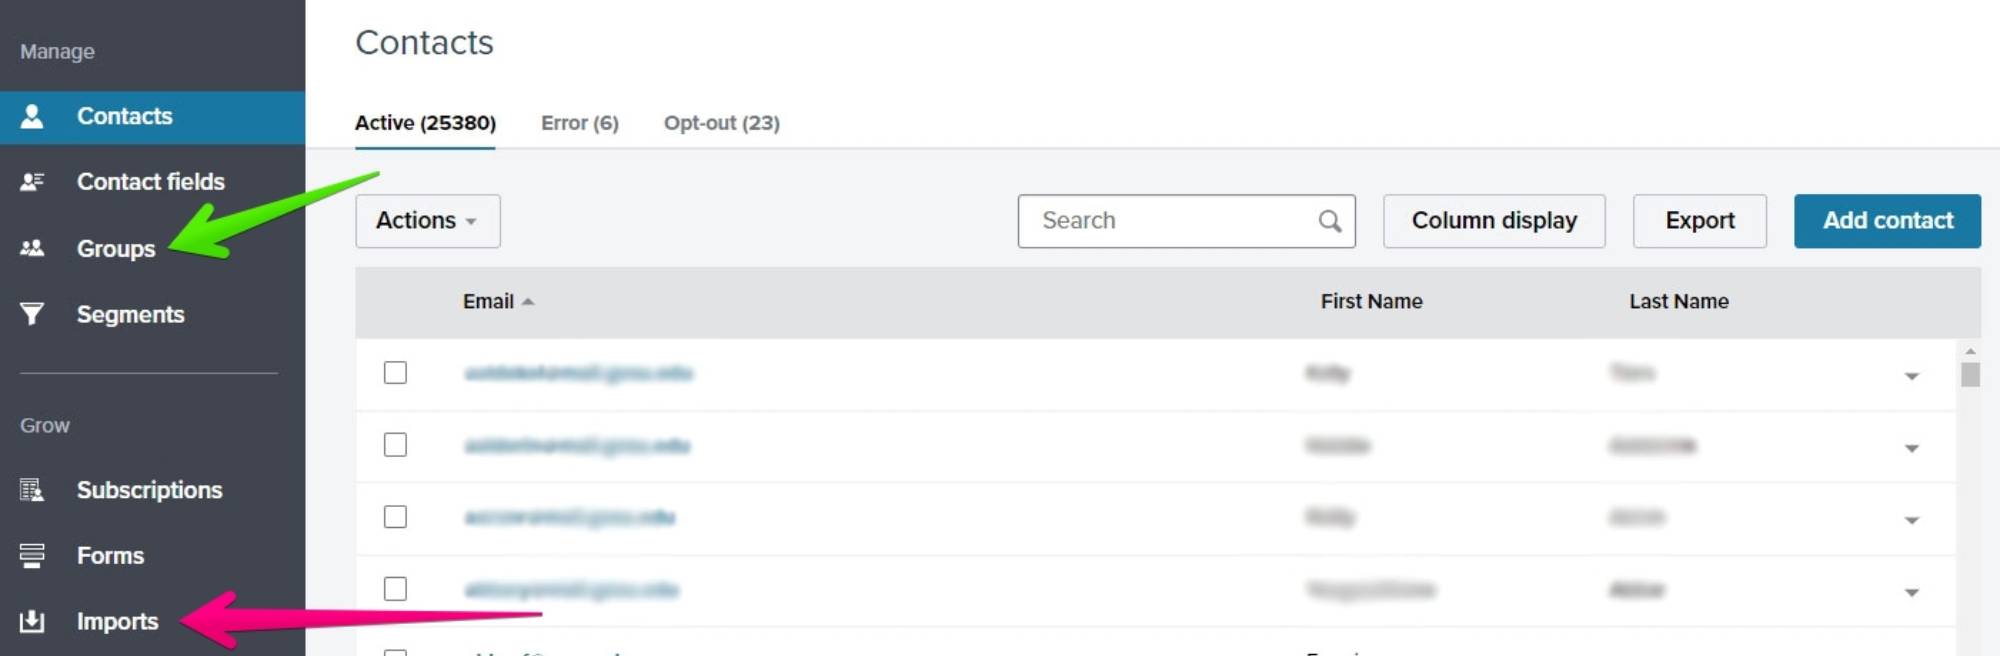
- To create a new audience group, click "Groups" (indicated by a green arrow, in the Manage section) then click the "Create a new group" button on the page that appears.
- If the audience group already exists, click "Imports" (indicated by a pink arrow, in the Grow section), then the "Import contacts" button on the next screen.
- First, you'll import your list via selecting the file on your computer.
- Now you'll be prompted to map your fields. If there are any fields you do not need to import data for, choose "Ignore" in the Contact Fields column. If your file has a header row, check "Skip" next to the Row 1 column heading.
- Next, choose what group the contacts should be added to.
- Finally, you'll see a summary screen. If everything looks correct, click "IMPORT". The import process typically takes a few minutes to complete.
Only need to add a few recipients to a group? From the Contacts screen, click the blue "Add contact" button on the right side of the screen.
In the email field, enter one email address. Before clicking the relevant save option ("Save and close", "Save and add another"), you may want to select what group(s) the email address should be included in; those can be found on the right side of the screen.

Sending
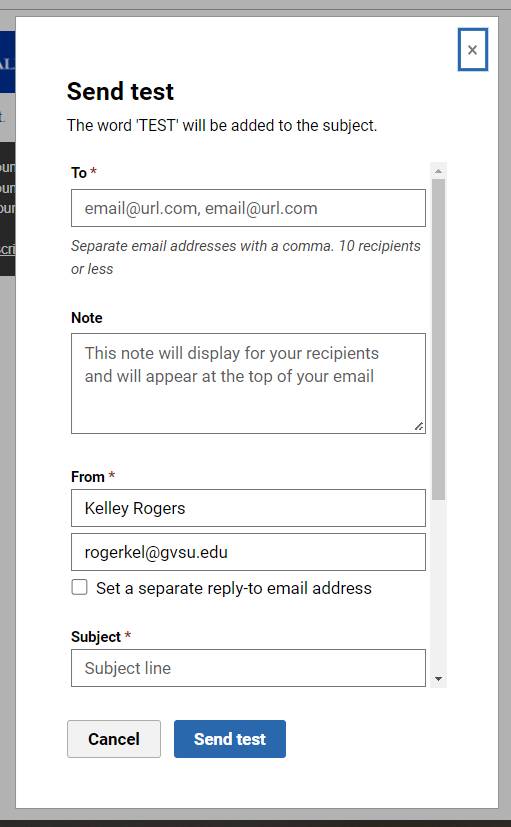
Emma allows you to send a test email to as many as 10 addresses at once. Click the "Send test" in the top toolbar, and a window will appear. From here, specify your recipient addresses, an optional note for your recipients, sender info, a subject and optional pre-header lines.
Tip: Send all test emails directly from Emma! All email clients tend to display emails differently, and forwarding an email can negatively affect how the email looks to the recipient.
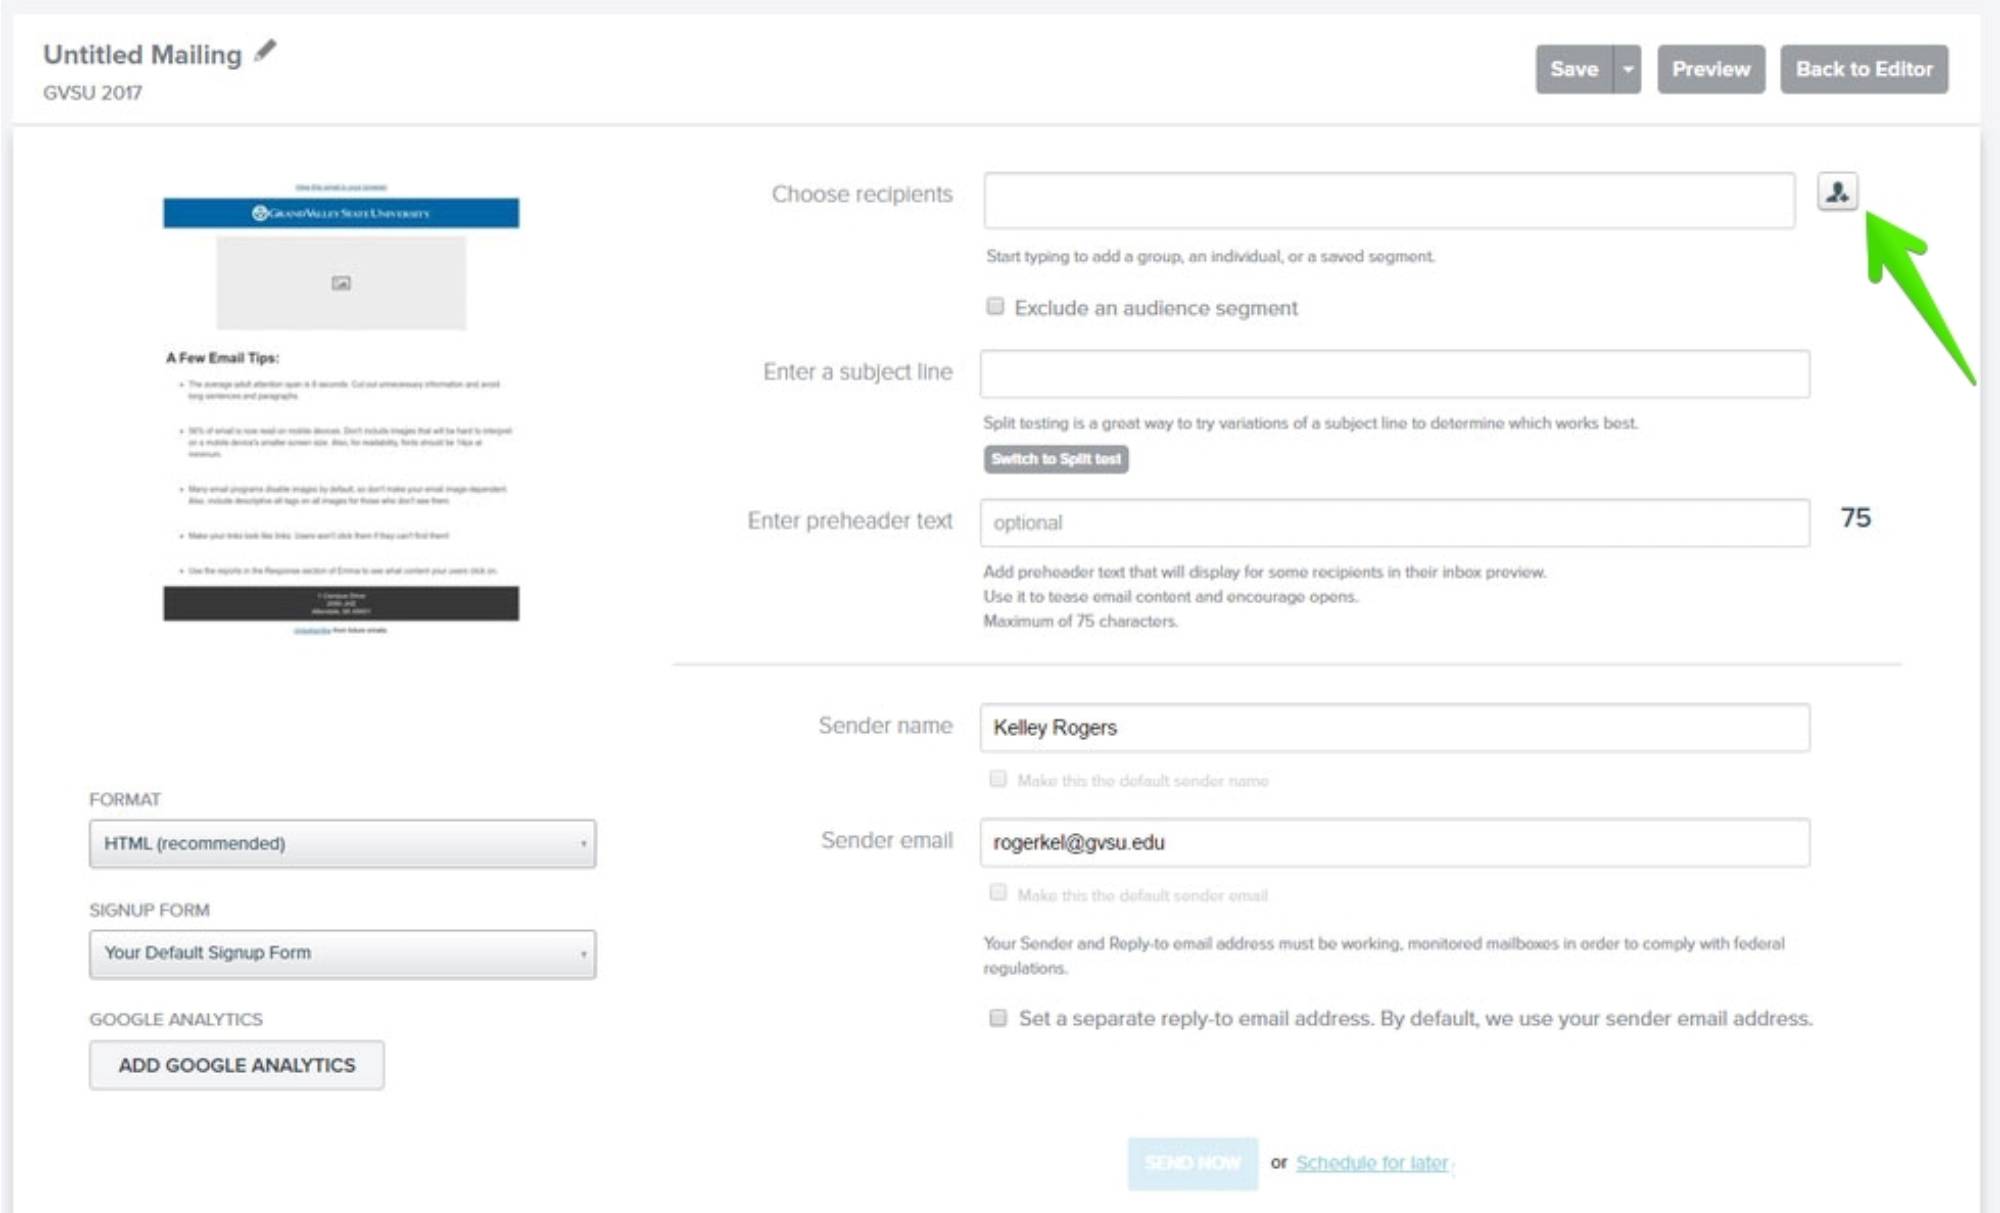
Once you're ready to send the email, click "Review" in the upper right corner. From there, specify the recipient list(s) and subject line, and confirm the sender information. Hint: Click the button with the silhouetted person behind the "choose recipients" box (indicated by the green arrow) to easily select your recipient list(s).
Send the email immediately by clicking the "Send now" button at the bottom of the screen, or choose to send the email at a later time by clicking the "Schedule for later" link.
Campaign Results
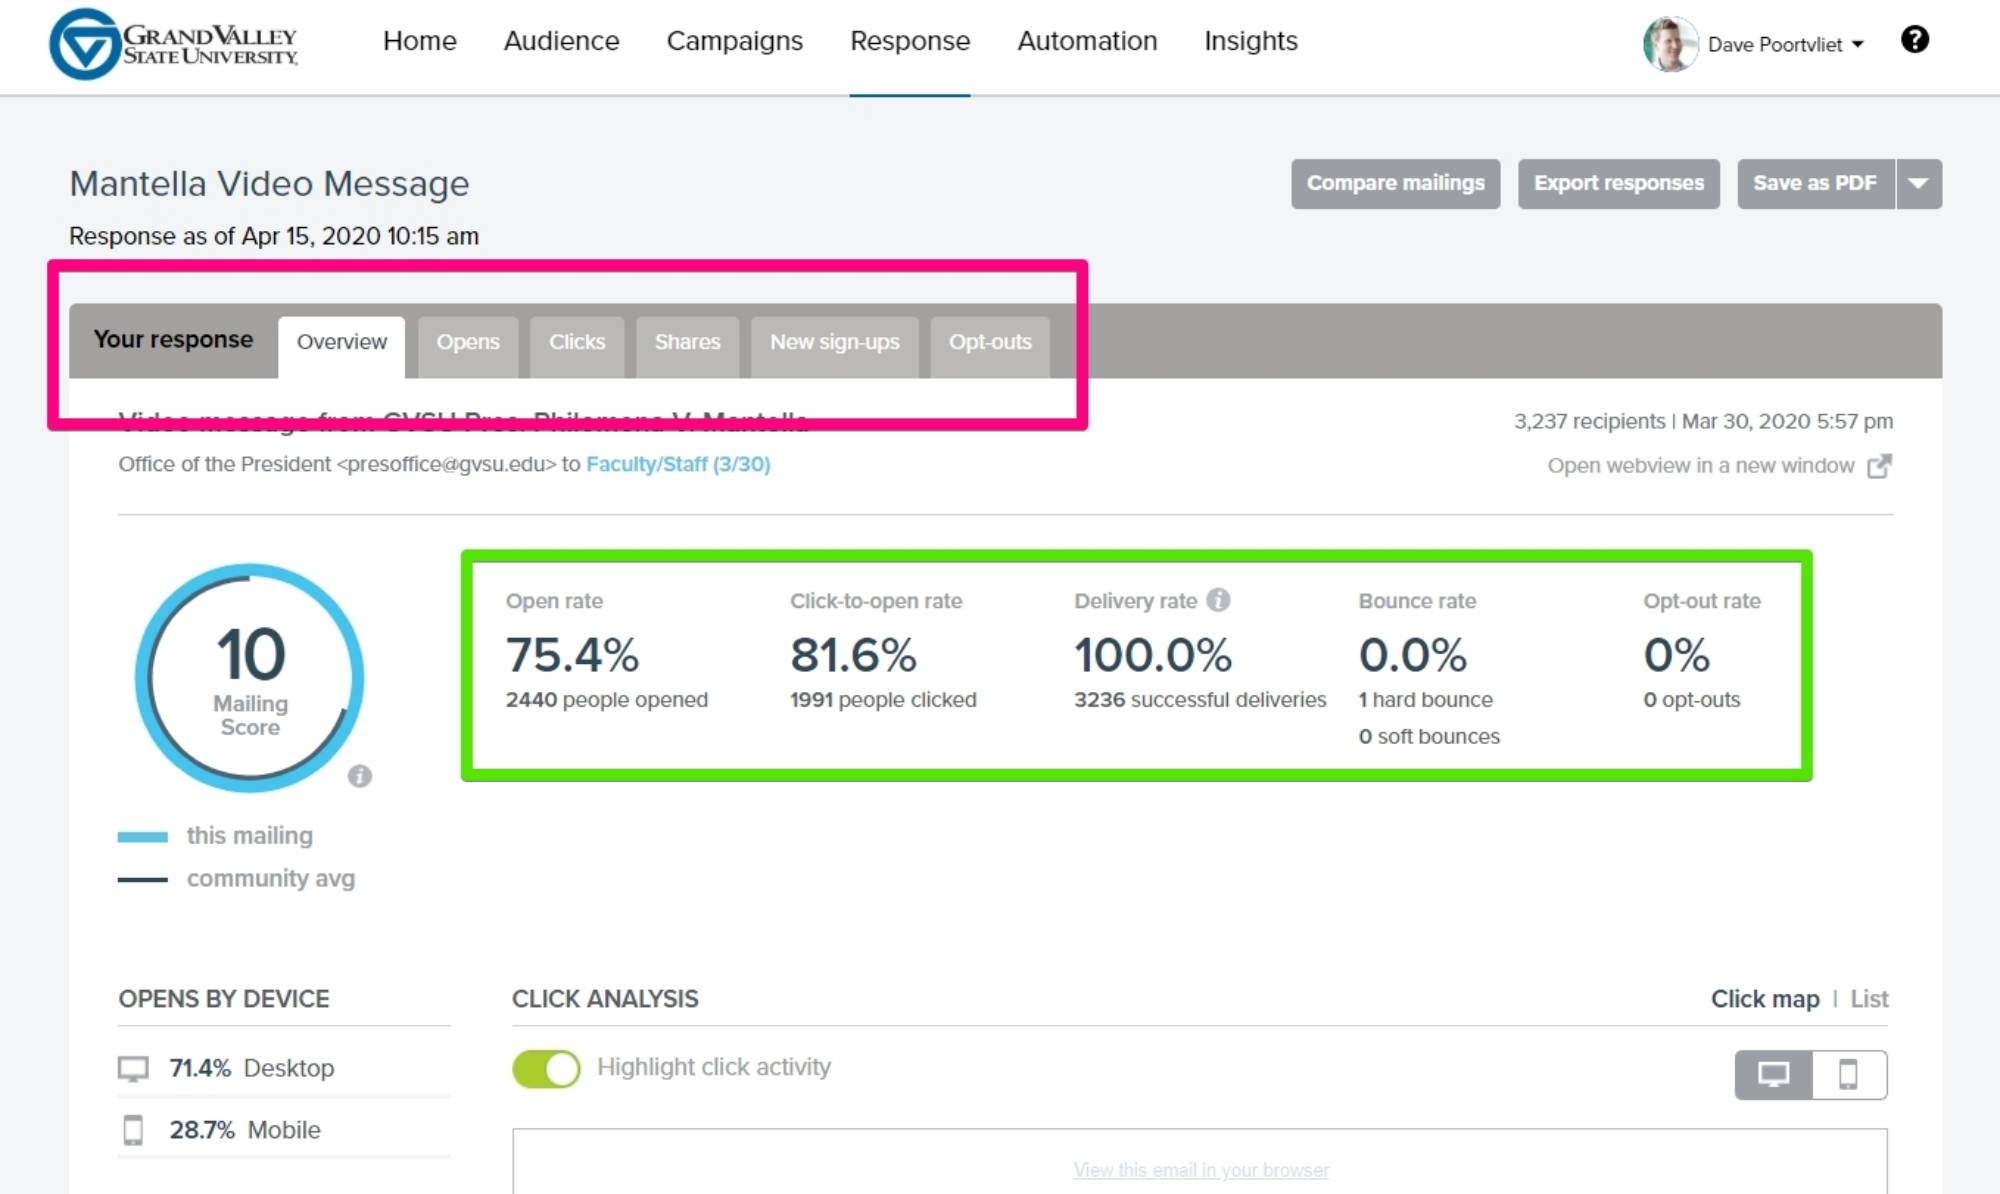
After the email is sent, you'll begin to see reports on the Response section of your account. Click the name of the campaign to view its reports.
Basic statistics are shown on the first screen: open rate, click-to-open rate (how many links were clicked by those who opened your email), etc.
To see more detailed response reports, click one of the tabs near the top of the screen (in the pink block).